
The Importance of The Initial Project Review, And What Happens After
Most project managers, juggling several jobs at once, struggle to find the time for a thorough project review. But skipping it — or doing it superficially — is the single most expensive habit in glazing project management. Every issue caught during the initial review saves hours of field rework, costly RFIs, and friction with the GC. This guide covers exactly when project reviews should happen, what to flag, how to document issues correctly, and the templates we use at MP Drafting to make sure nothing slips through.
What Is a Project Review?
A project review is a structured examination of a project’s shop drawings, specifications, and contract documents before fabrication or installation begins. The goal is simple: identify anything that falls outside normal material constraints, standard fabrication procedures, or routine installation methods — and flag it for your team, vendors, and field staff. In other words, reviewing a project is your one organized opportunity to catch problems while they’re still cheap to fix. A good project review answers four questions:
- Does what’s on the drawing match what’s actually been ordered?
- Are there any details that fall outside your team’s normal procedures?
- Are there any constructability issues the architect or engineer may not have considered?
- Do field crews and fabricators have everything they need to execute without calling for clarification?
If the answer to any of these is “no” or “I’m not sure,” you’ve already justified the time spent on the review of the project.
When Should the Initial Review Happen?
The initial review should happen immediately after shop drawings come back from the engineer and before materials are ordered or released to fabrication. Specifically:
- After: shop drawings are approved (or returned “approved as noted”) by the GC, architect, and structural engineer
- Before: purchase orders go out, material is cut, or field staff receive drawings to install from
This timing is non-negotiable. A review of project drawings done after fabrication starts is no longer a review — it’s damage control. For projects with multiple submittal packages (curtain wall, storefront, doors, etc.), the initial review happens for each package as it returns from engineering. Don’t wait until everything is approved before reviewing — by then, the lead-time on whatever package returned first is already eaten up.
Why Project Reviews Matter in Project Management
In project management, the project review is the most leveraged hour you’ll spend on a job. The economics are stark:
- A flagged issue caught at initial review: ~15 minutes to document, $0 cost
- The same issue caught during fabrication: usually 2–4 hours of rework, plus material waste
- The same issue caught in the field: schedule delay, expensive crane time wasted, possible re-engineering
The math always favors the review of a project done early. And yet, most PMs underinvest in this step because:
- Shop drawing returns feel like a green light to start ordering
- The pressure to release material to keep schedule is intense
- Reviewing drawings is unglamorous compared to closing out RFIs or running coordination calls
The PMs who consistently hit their schedule and budget targets are the ones who treat reviewing projects as the most important hour of the week, not the least.
How to Review a Project: A Step-by-Step Process
Here’s the process we use at MP Drafting. It’s the same process taught in LearnGlazing’s Initial Project Review course. Step 1: Gather Everything in One Place Before you start reviewing a project, pull together:
- Latest approved shop drawings (with all engineering stamps)
- Architectural and structural drawings (current revision)
- Project specifications (the actual divisions you’re responsible for)
- Approved submittals for glass, framing, hardware, sealants
- Any prior RFIs and their responses
- Your scope letter or contract drawings
If anything is missing or outdated, stop the project review and request it. Reviewing against stale documents is worse than not reviewing at all. Step 2: Walk the Drawings as if You’re Going to Install Them The most effective way to review a project is to mentally walk through installation from start to finish. For each section of work:
- Can a fabricator cut and prep these parts without ambiguity?
- Can a field crew install this without stopping to ask questions?
- Are there sequence-of-construction issues — anything that has to be installed before or after another trade?
Anything that breaks this mental walkthrough gets flagged. Step 3: Identify Items Outside Normal Procedure This is the heart of the review. You’re not looking for spec violations — the engineer already checked those. You’re looking for:
- Unusual material callouts (a one-off finish, a non-stock profile)
- Atypical fabrication requirements (custom miters, non-standard anchorage)
- Installation conditions that differ from your team’s standard practice
- Tolerances tighter than your usual scope
These are the issues that cost money in the field because field crews and fabricators expect normal procedure unless explicitly told otherwise. Step 4: Document Every Flag on the Drawing Every issue you find during project reviews should be documented directly on the drawing using a consistent notation format. We’ll cover the notation method below. Step 5: Route Flags to the Right People Some flags become RFIs to the architect or engineer. Others become internal notes for fabrication. Others become field-staff alerts. The same project review should produce three deliverables:
- A list of issues requiring formal RFIs or change orders
- A marked-up drawing set with internal notations for fabrication
- A field-staff briefing on anything they need to watch for during installation
A Project Review Checklist
Use this checklist every time you’re reviewing a project:
- Shop drawings match approved submittal product/finish
- All glass types called out match the approved glass schedule
- Framing sizes and finishes match the approved package
- Anchor types and embeds are coordinated with structural drawings
- Sealant joint widths fall within manufacturer tolerances
- Movement joints accommodate the building’s documented movement
- Hardware schedule matches both the door schedule AND the spec
- Fire-rated assemblies have the required UL/Intertek listings noted
- All RFIs from prior reviews have been incorporated
- Anything outside normal fabrication procedure is flagged
- Anything outside normal installation procedure is flagged
- Field staff know what to look for at first material delivery
If you can check every box, the review of the project is complete and you can release to fabrication with confidence.
Moving from Review to Notations
Whenever you find something during a project review that could be an important issue for your team, vendors, or field staff, it’s important to document it directly on the drawing. Below is what we at MP Drafting have found is the best way to add this information to your shop drawings. Following this process will ensure any issues you find are clearly highlighted and minimize the chances of mistakes down the road. Before we dive in, though, it’s important to keep in mind that any notes you add to your shop drawings do not replace formal lines of communication such as requests for information (RFIs) or change orders. These are very important for protecting your company from liability arising from the use of improper products, missed schedule milestones, etc. Think of the process in this article as an add-on to the more formal processes, and a useful way to get everyone on the same page.
Our Method for Writing Shop Drawing Notations
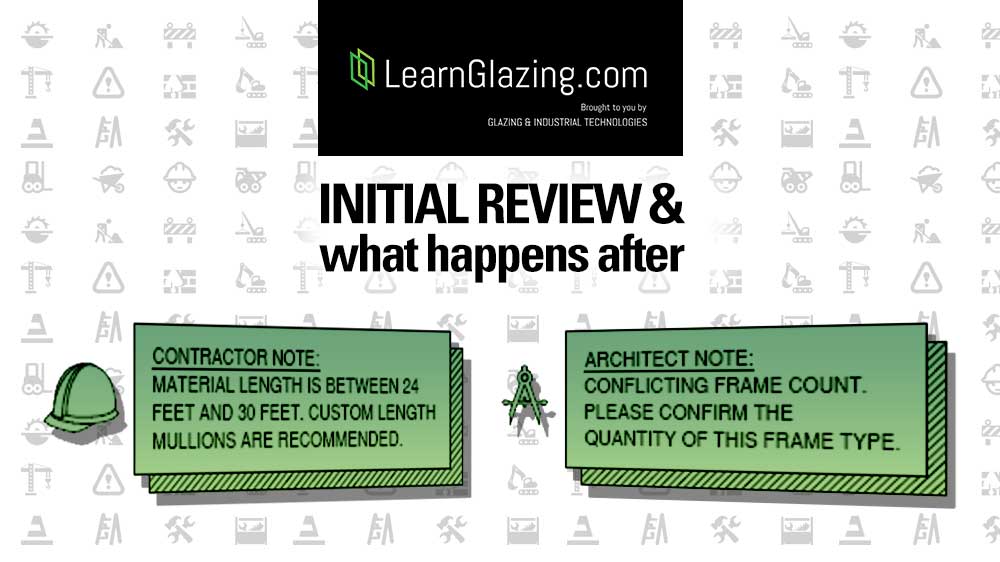
What makes a good shop drawing notation? Well, for one, it should stand out. That means it should be written in bold font and featured prominently on the page, not hidden in the corner. How big should it be? Big enough so that no one could reasonably accuse you of failing to disclose the issue or information. This may seem obvious, but we’ve seen (on many occasions) notes to the project architect get lost in the process simply because they weren’t visible enough.

Tip: A simple way to make a notation stand out is to put a box with bold borders around it (like in the example above). It’s also a good idea to use the same format for notations on all pages of your shop drawings. This will help get everyone in the habit of paying attention to your notations. If you scroll down to the end of this article you’ll see several more notation templates that you can use for your drawings. Second, your note should call out the person whose attention you’re trying to get. For example, a note to the project architect could be labelled “Architect Note”, and a note for installers “Installer Note”. You could even add icons to your note to draw even more attention to it. In the examples below this article, you can see that we’ve used unique icons for each project role: a hard hat for the general contractor, a compass for the architect (see the example below), a hammer and wrench for the installer, and so on.
If the purpose of your note is to ask for clarification from the architect, you can frame it in the form of a question and add a Yes/No box (we’ve shared examples like this below). Note: Even though it’s folks like the general contractor, project engineer, and architect who will be reviewing the drawings, you can (and should!) still use notations on drawings for fabrication and field staff who will rely on the shop drawings to do their jobs correctly and efficiently. So when you’re doing your project review, it’s important to identify and flag areas that fall outside of normal fabrication and installation procedures. This will prevent delays that arise when fabricators and installers have to contact the project engineer for clarification.

Common Mistakes in Project Reviews
After 20 years of reviewing projects at MP Drafting, the same mistakes show up over and over:
- Treating the review as a formality. If you’re not finding anything to flag, you’re not really reviewing — you’re skimming.
- Reviewing alone. A second set of eyes (lead glazier, senior PM, or the estimator) catches things you’ll miss every time.
- Reviewing without the spec. Shop drawings tell you what. The spec tells you what’s allowed. Without both, you’re guessing.
- Skipping the field briefing. Even a thorough review of a project is wasted if field staff don’t know what to look for. Plan for a 15-minute briefing at pre-installation.
- No documentation system. If your project reviews consist of “I’ll remember it,” you’ve built a single point of failure into your project management.
Frequently Asked Questions
What is a project review in project management? A project review in project management is a structured examination of project documents — drawings, specifications, submittals — to identify issues before they cost money in fabrication or the field. In glazing, it’s most critical immediately after shop drawings are approved and before material is ordered. When does the initial review happen? The initial review happens after shop drawings are returned approved (or approved-as-noted) by the engineer, GC, and architect — and before purchase orders are released. On multi-package projects, each submittal gets its own initial review as it returns. How long should reviewing a project take? For a typical commercial glazing package, plan on 2–4 hours of focused review per submittal package. Skipping it to save those hours is the most expensive false economy in project management. Who should be involved in project reviews? The lead project manager runs the project review, but a senior estimator, lead glazier, or experienced PM should provide a second pass. Two reviewers find roughly 80% more issues than one. What’s the difference between a project review and an RFI? A project review is your internal process for finding issues. An RFI is one of the formal outputs of that review — the mechanism for asking the architect or engineer to resolve an issue you’ve identified. Reviews find problems; RFIs resolve the ones outside your authority to solve. Do I need to review projects that have already been approved by the engineer? Yes. Engineering approval confirms the design meets code and structural intent. It does not confirm that the drawings are constructable, that your team can fabricate them as-drawn, or that field installation is feasible. Those are your responsibility, and that’s what the project review is for.
Hello! This is the Gutenberg block you can edit directly from the WPBakery Page Builder.
Summary
Remember, anything that falls outside of normal material constraints or fabrication/installation procedures should be flagged in a note on your drawings. You can use the templates below to make sure every notation you write:
- Is easily noticeable on the drawings,
- Calls out the person who needs to review or use the information, and
- Clearly and briefly identifies the issue.
A thorough project review is a skill that compounds. The more reviews you run with a consistent process, the faster and more accurate you become — and the more your team learns to flag issues on their own. Questions? Contact us with your questions or comments. We’ll be happy to help! Also, if you want to learn more, you might be interested in LearnGlazing.com’s “Initial Project Review” course. Visit our website to learn more and sign up.

